Many parts of the garments we stitch call for a narrow hem. Some machines do not come equipped with a hemming foot. If you have never used a hemming foot, I encourage you to see if there is a foot for your brand of machine. They make the hemming process in certain circumstances “slick as whistle” ! But if that is not an option for you, I want to give some helpful tips in this entry.
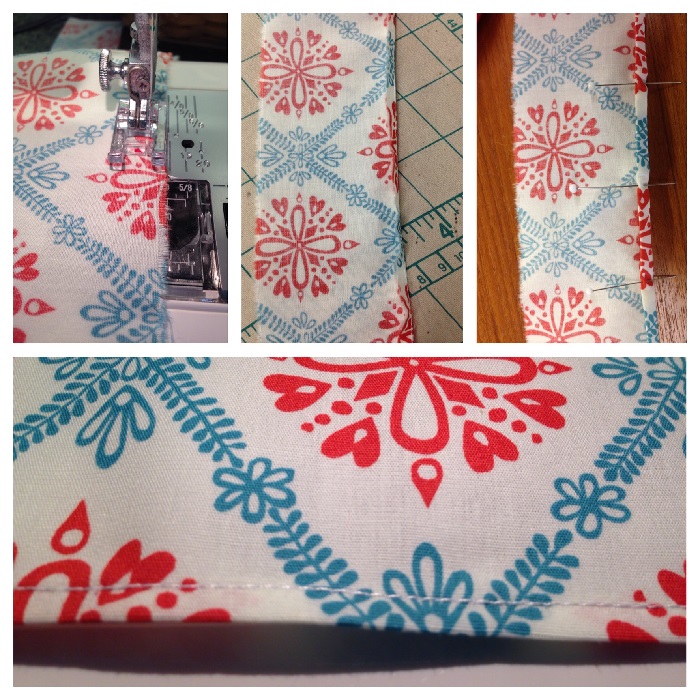
In my photo uploaded, starting from the upper left, set your needle position as far right as it will go. Stitch a narrow line of stitching along the raw edge. When completed, press well over that stitched section.
In the middle upper photo, turn on that stitching line to the wrong side of your garment or garment pattern piece. Press as you go, using a bit of starch if you feel it needs a bit of help staying put!
The last upper right photo shows a second turn of the fabric, just the width of the first run and pinned in place. If you want accuracy then PIN the second turn, don’t rely on your hands to turn that an even second turn. After pinning, press between the pins to help hold it down before stitching. Stitch close to the inside fold to secure in place.
You choose if you want to emphasize the stitching or have it blend in. This will mean using a contrast thread or not. This method will give you a nice narrow even hem. The hemming foot will still give you an even narrower hem, but this gives about an 1/8″ wide hem.
Give it a try with your next project
Happy Stitching, Sylvia